Add Row
Add Element
cropper
update
Home Remodeling Trends
update
Add Element
  • Home
  • Categories
    • Featured
    • Home Improvement Tips
    • Curb Appeal
    • Ohio/National News
    • Real Estate News
    • Mortgage News/Rates
    • Local News
    • Home Decor/Interior Design
    • Extra News
  • Featured Business
July 03.2025
3 Minutes Read

Clean Your Bike Chain Effectively with This DIY Device Tip

DIY bike chain cleaning device tips with a toothbrush and drill.


Understanding the Importance of a Clean Bike Chain

For avid cyclists, maintaining a bike is as crucial as the ride itself. One of the key components that infrastructure a bike's performance is its chain. A clean bike chain ensures smooth gear transitions, improves efficiency, and prolongs the lifespan of the drivetrain. A dirty chain can lead to poor gear shifting, increased wear on cogs, and ultimately, costly repairs. Hence, keeping your bike chain clean is not just an aesthetic choice, but a vital maintenance practice that every cyclist should prioritize.


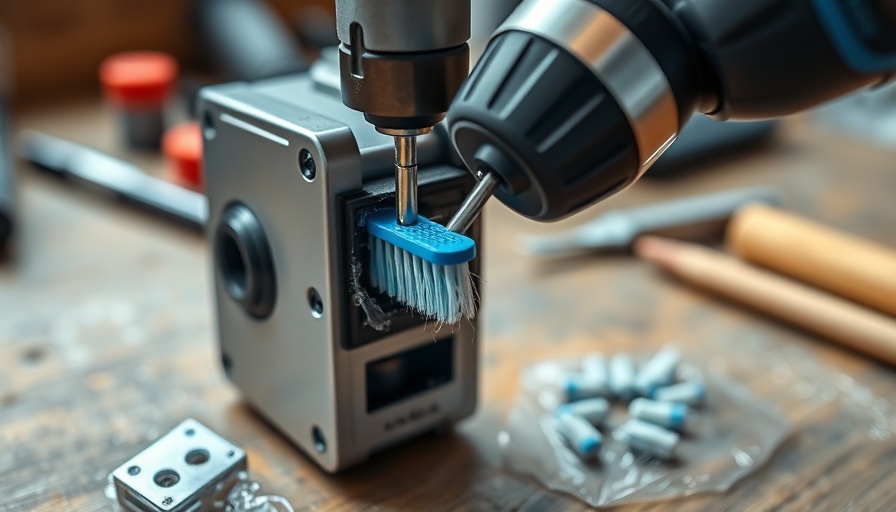
In "Cyclists, remember this tip! How to Make Useful DIY Bike Chain Cleaning Device," the video reveals practical insights into bike maintenance that prompt a deeper exploration of DIY solutions.

DIY Chain Cleaning Solutions: Why Go Homemade?

Using a DIY bike chain cleaning device, as highlighted in the video "Cyclists, remember this tip! How to Make Useful DIY Bike Chain Cleaning Device," can be an effective way to save money while avoiding commercial products that may contain harsh chemicals. DIY solutions allow cyclists to tailor their cleaning approach according to their unique needs and preferences. Consider items commonly found at home that can be transformed into effective chain cleaning devices, such as old toothbrushes or repurposed plastic containers. This approach not only encourages creativity but also promotes sustainability by reducing waste.

A Step-by-Step Guide to Creating Your DIY Chain Cleaner

Creating your DIY bike chain cleaner could be simpler than you think. Gather the following materials: an old toothbrush, a small container, and some degreaser or dish soap. Follow these steps to make an effective chain cleaner:

  1. Prepare the degreaser: Mix your cleaner with water in the container, aiming for a solution that’s strong enough to cut through grease but gentle enough not to damage your chain.

  2. Attach the toothbrush: Secure the head of the old toothbrush into the container so that it can reach the chain while being submerged.

  3. Clean the chain: Place your bike on a stand, pedal backward to rotate the chain, and use the toothbrush to scrub away built-up grime as the chain passes through the cleaning solution.

  4. Rinse and dry: After scrubbing, rinse the chain with water and dry it thoroughly to prevent rust.

Innovations in Bike Maintenance Tools

Tools designed for bike maintenance are continuously evolving, with innovations emphasizing user-friendliness and efficiency. Consider advancements in chain-cleaning systems, such as ultrasonic cleaners, which use high-frequency sound waves to dislodge dirt at a microscopic level. A cleaner chain translates directly into improved performance, making these solutions appealing for serious cyclists. However, the choice of a homemade cleaner or an innovative product ultimately depends on individual cyclist preferences and budget considerations.

Future Trends in DIY Bike Maintenance

As the cycling community becomes increasingly invested in sustainability, there’s a noticeable shift toward using homemade or environmentally conscious bike maintenance solutions. Emerging trends show that cyclists are more inclined to mix DIY methods with store-bought ingredients to create effective cleaning solutions that don’t compromise environmental integrity. This trend reflects a broader societal movement toward responsible consumerism, where enthusiasts look to maintain their equipment without contributing to waste.

Summing It Up: Why Clean Your Bike Chain?

Ultimately, cleaning your bike chain should be considered an essential part of any cyclist's routine maintenance plan. Regular upkeep not only improves performance but also reduces the risk of expensive repairs stemming from neglect. By utilizing DIY chain cleaning solutions as delineated in the video, cyclists can engage in maintenance practices that are cost-effective and align with their environmental values. Embrace this joy of cycling not just in your rides, but also through the conscientious care of your bike's components.


Home Improvement Tips

1 Views

0 Comments

Write A Comment

*
*
Related Posts All Posts
09.05.2025

The Correct Way to Dig a Trench for Electrical Lines: What Homeowners Must Know

Update The Essential Guide to Digging a Trench for Electrical Lines When it comes to home improvement projects, ensuring a safe and efficient installation of electrical lines is paramount. Homeowners and contractors alike must be aware of the essential steps needed to properly dig a trench. Whether you're planning extensive renovations or simply updating your home's electrical system, understanding the basics of trench digging can help prevent costly mistakes.In 'The Right Way to Dig a Trench for Electrical Lines,' the video explores crucial techniques for safe electrical installations, and we’re diving deeper into the insights necessary for homeowners and contractors alike. Why Digging a Proper Trench Matters One might wonder why the technique of trench digging holds such significance in home improvement projects. A proper trench is vital for several reasons: Safety: Improperly dug trenches can expose buried lines and pose serious risks. Exposing electrical wires can lead to shocks and fires, jeopardizing both property and lives. Compliance: Many areas have regulations regarding the depth and width of trenches for electrical lines. Adhering to these guidelines not only avoids fines but also ensures the safety and longevity of your electrical installations. Efficiency: A well-planned trench makes the installation process faster and facilitates easier access for future repairs or upgrades. Step-by-Step Approach to Trench Digging Before you grab your shovel, it's crucial to prepare adequately. Here are key steps to follow: 1. **Planning Your Route** Before digging, determine the most efficient route for your electrical lines. This minimizes the impact on your landscaping and existing structures. Use visual markers or flags to outline your path clearly. 2. **Check for Underground Lines** Prior to digging, it’s wise to contact your local utility company to confirm the locations of any existing underground lines. They often provide services to mark these lines for you, preventing unnecessary accidents. 3. **Gather Necessary Tools** Having the right tools makes all the difference. Essentials include a shovel, a trenching machine (if available), gloves, and safety goggles. If your trench requires a length of over 20 feet or more, consider using trenching equipment for more extensive work. 4. **Digging the Trench** When you begin digging, aim for a depth of about 18 inches, which is compatible with most local codes for electrical installations. Ensure the sides of the trench slope slightly inward to maintain stability and prevent collapses. 5. **Backfilling and Installing Electrical Conduit** Once your electrical lines are in place, backfill the trench carefully. Ensure the soil is compacted, minimizing the risk of settling in the future which can cause surface cracks. Installing a conduit can offer additional protection to your electrical lines. Common Misconceptions About Trenching Understanding the truths behind some misconceptions about trenching can help homeowners and contractors make better decisions. One common myth is that digging doesn't require much planning—this couldn't be further from the truth! Effective planning is essential to avoid errors that could lead to safety hazards. Future Trends in Home Renovations As home renovations become more sophisticated, so do the methods and technologies used in electrical installations. Professionals are now incorporating smarter electrical systems that align with modern technologies, ensuring any trenching work done today is future-proof. Getting Your Home Ready for Inspection It’s crucial to ensure that all electrical work, including trenching, meets local codes and standards. Schedule a visit from your local building inspector once your installation is complete to ensure everything is in compliance before finalizing your renovation project. Conclusion: Empower Your Home Renovations Understanding how to dig a trench for electrical lines not only improves your home’s safety but also enhances its functionality. As you embark on your home improvement projects, whether it’s a kitchen remodel, bathroom remodel, or adding a basement, incorporate these tips to enhance the overall quality of your renovations. If you’re eager to take charge of your home renovations today, ensure you keep safety and compliance at the forefront of your projects for lasting results!

09.05.2025

Discover the Best Gutter Covers for Your Home in 2025

Update Understanding the Importance of Gutter Protection As homeowners strive to maintain their properties, a dependable gutter system emerges as a critical component. Many overlook the necessity of effective gutter covers, yet poorly maintained gutters can lead to substantial damage over time, including roof leaks, damaged fascia, and even compromised foundations. A classic dilemma arises every year, especially as the seasons change: should you clean your gutters or upgrade to a more robust system? With various options available, choosing the right gutter cover becomes paramount.In 'Top 3 Gutter Covers I’d Actually Put on My Own House in 2025,' the discussion delves into effective gutter protection solutions, prompting us to analyze their implications for homeowners. Key Insights from Top Gutter Cover Recommendations In the video titled "Top 3 Gutter Covers I’d Actually Put on My Own House in 2025," the speaker emphasizes practicality over an overwhelming array of options. Instead of presenting numerous products, three specific types of gutter covers are highlighted for their effectiveness and reliability. These choices come from personal experience and rigorous assessment, focusing on designs that not only keep debris out but also offer longevity. For those less familiar with gutter technologies, this guidance provides not just options but also a rationale based on hands-on experience with various products. Micro Mesh Gutter Covers: The Gold Standard Among the recommendations, micro mesh panels stand out as the preferred choice. Characterized by their fine mesh design, these covers prevent leaves and small debris from entering the gutter system while allowing rainwater to flow freely. This design reduces the frequency of clogs significantly, providing homeowners with peace of mind. Furthermore, micro mesh products often come at competitive prices; with some options priced as low as $2 per foot, they represent an economically sound choice. Ensuring a product has a firm attachment to the fascia enhances its durability, making it less prone to neglect. Raindrop Gutter Covers: Premium Protection The second choice, Raindrop, is less accessible in major hardware stores but makes an impression with its heavy-duty construction and hail warranty. The unique design of Raindrop ensures optimum water flow while preventing debris accumulation, setting it apart in the market. Although more difficult for homeowners to procure, working through a trusted contractor guarantees quality installation, amplifying its long-term benefits. Recognizing the Limitations of Standard Gutter Covers Many common gutter covers sold in big box stores may not efficiently address the issues they claim to resolve. As highlighted in the video, imitation products with ineffective designs frequently lead to water overflow and eventual structural damage. Homeowners should be wary of flashy marketing; sometimes, the most effective solutions are those that do not appear to be the most innovative. Recognizing the underlying engineering principles behind successful gutter designs can save you from recurrent gutter cleaning and more significant repair bills. Choosing Quality Over Cost Investing in quality gutter covers can help homeowners avoid severe repair costs down the road. Many cheaper products offer limited lifespans of just a few years, while higher-quality options can last well over a decade. As the speaker mentions, opting for top-quality materials like micro mesh or Raindrop can significantly enhance the lifespan of your gutter system, improving not only the performance but also the aesthetics of your home. Assessing Your Gutter Needs Homeowners should engage in proactive evaluations of their gutter systems, especially as seasonal changes bring about potential debris challenges. Tools and services like houseser.com provide useful insights into potential maintenance needs and costs, making gutter upkeep manageable. By leveraging technological advancements, homeowners can seamlessly find contractors and products that suit their requirements. Conclusion: The Path to a Safer Home Gutter maintenance shouldn't be neglected or viewed as a hassle. With the right gutter cover, homeowners can furnish their properties with protection that doesn't just look good but also substantially reduces risk. Transitioning to recommended products can alleviate the stress associated with seasonal changes and property maintenance. Explore your options, seek professional input where needed, and invest wisely in gutter technology for a safer, more resilient home.

09.05.2025

Discover Essential DIY Plumbing Hacks for Home Repairs

Update Unlocking the Secrets of DIY Plumbing: Simple Hacks for HomeownersUnderneath the polished surface of modern homes lies a vast network of plumbing that often goes unnoticed—until problems arise. Whether you’re dealing with a pesky leak or planning a home improvement project, understanding the basics of plumbing can save you time and money, transforming what are often daunting repairs into manageable DIY tasks. Let’s delve into some practical DIY plumbing hacks that not only simplify repairs but also empower homeowners with newfound skills.In Great DIY Plumbing Hacks That Will Come in Handy, the discussion delves into valuable tips for DIY enthusiasts, highlighting practical insights that inspired our deeper analysis. Historical Context of DIY PlumbingBefore the advent of advanced plumbing systems, homeowners had to rely on simple tools and techniques for maintenance and repair. Historical plumbing hacks often involved improvisation, using everyday items to fix leaks or clear clogs. While modern plumbing technologies have made significant strides, these hacks remind us of the resourcefulness that lies at the heart of DIY culture, making knowledge of plumbing essentials an invaluable skill even today.How These Tips Benefit HomeownersUnderstanding DIY plumbing hacks can vastly improve your resourcefulness when facing home issues. Simple tricks—like using zip ties to secure loose pipes or employing baking soda and vinegar to unclog drains—can save you from costly professional repairs. These tips not only reduce your expenses but also instill confidence in your abilities as a homeowner. The thrill of successfully managing repairs fosters a greater appreciation of your home and its inner workings.Common Plumbing Myths DebunkedMany homeowners hold misconceptions about plumbing repairs. For instance, some believe that all clogs require harsh chemicals, while a simple mixture of baking soda and vinegar can often do the trick without damaging pipes. Similarly, others think that any leak necessitates a professional plumber. In truth, learning to identify minor leaks and repairs can empower homeowners to manage their spaces more effectively and efficiently.Future Trends in Home Plumbing SolutionsAs we move forward in an era of digital transformation, the plumbing industry is not left behind. Many are embracing smart technologies to automate maintenance and provide real-time alerts for leaks or malfunctions. Such advancements will increasingly allow homeowners to conduct repairs with unprecedented ease and efficiency, paving the way for a new generation of DIY enthusiasts equipped with high-tech tools.Practical Insights: Tools Every DIYer Should HaveThe foundation of successful DIY plumbing lies in having the right tools. Basic plumbing repair skills can flourish with simple tools like adjustable wrenches, plungers, and pipe wrenches. Additionally, homeowners should invest in a drain snake and a pipe inspection camera for more serious issues that might lurk beneath the surface. Educating oneself on how to use these tools properly not only improves the chances of a successful repair but also promotes an engaging and informative experience.Empowering Homeowners: The Emotional ConnectionThe sense of achievement derived from successfully completing plumbing projects is profoundly rewarding. Engaging in practical home repair doesn’t only save money; it fosters a closer relationship with your living space. Homeowners often feel a renewed pride in their homes when they tackle and resolve challenges independently. The emotional benefits of DIY projects extend beyond the physical spaces—they encompass a sense of personal empowerment and capability.Conclusion: Your Journey in DIY Plumbing Starts HereAs we explored the topic, it’s evident that simple DIY plumbing hacks can significantly enhance your skills and confidence as a homeowner. Engaging in these projects can transform mundane tasks into rewarding experiences, leading to both practical and emotional benefits. Remember, the next time a plumbing issue arises, consider tackling it with these hacks before reaching out for professional help. Embrace the DIY spirit and make the most of your home improvement journey!

Terms of Service

Privacy Policy

Core Modal Title

Sorry, no results found

You Might Find These Articles Interesting

T
Please Check Your Email
We Will Be Following Up Shortly
*
*
*