Add Row
Add Element
cropper
update
Home Remodeling Trends
update
Add Element
  • Home
  • Categories
    • Featured
    • Home Improvement Tips
    • Curb Appeal
    • Ohio/National News
    • Real Estate News
    • Mortgage News/Rates
    • Local News
    • Home Decor/Interior Design
    • Extra News
  • Featured Business
August 05.2025
3 Minutes Read

Unlocking Clever Plumbing Tricks: How to Connect a Watering Tap to Plastic Pipes

Hands performing plumbing repairs on a metal pipe joint outdoors.

Understanding the Importance of Proper Tap Connections

Establishing a reliable watering tap connection to plastic pipes is pivotal for any homeowner or gardener. This seemingly simple connection can significantly impact water flow and availability. As we increasingly shift towards DIY projects in home improvement, understanding effective plumbing tactics is crucial for ensuring functionality and longevity in our home systems.

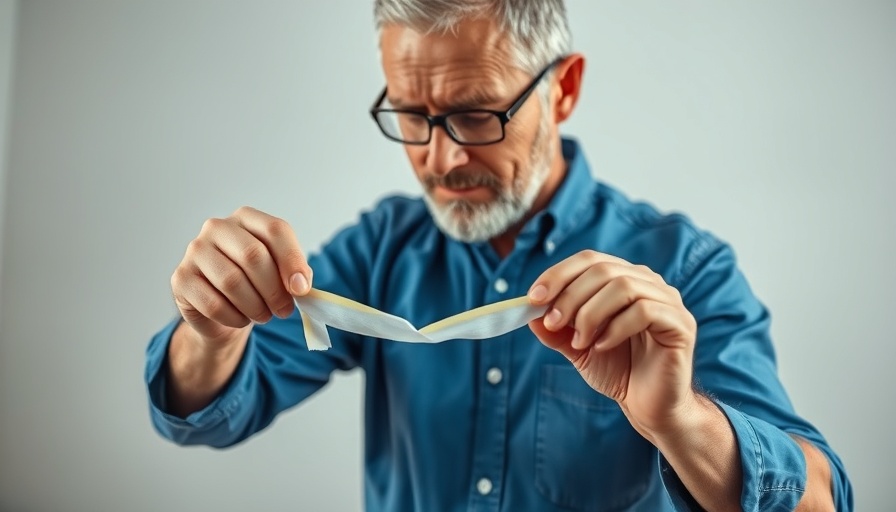
In 'Clever Plumbing Trick for Connecting a Watering Tap to a Plastic Pipes,' the discussion dives into practical plumbing solutions, exploring key insights that sparked deeper analysis on our end.

Common Home Improvement Challenges in Plumbing

Many homeowners face challenges when attempting to manage their plumbing repairs, particularly with plastic piping. Plastic pipes, while lightweight and corrosion-resistant, can pose unique difficulties during installation. Missteps in connecting watering taps may lead to leaks or reduced water pressure, which can be detrimental not only to gardens but also to broader plumbing systems. Learning how to navigate these connections effectively is a critical skill for any DIY enthusiast.

A Clever Trick for Watering Tap Connections

In the video titled "Clever Plumbing Trick for Connecting a Watering Tap to a Plastic Pipe," viewers are introduced to a practical technique that simplifies the process of ensuring a firm connection. This trick utilizes common materials and tools, making it both cost-effective and achievable for the average homeowner. The emphasis here is on innovation through simplification, where a little ingenuity can lead to greater efficiency.

The Role of Carpentry in Plumbing Projects

Interestingly, plumbing tasks often intersect with carpentry, especially when constructing outdoor structures like raised beds or garden installations. It’s essential for DIY enthusiasts to have a grasp of both skills. Carpentry comes into play when designing the layout of garden systems that will house plumbing components. Therefore, integrating carpentry skills with plumbing knowledge can yield superior results.

Future Trends in Home Improvement and DIY

The DIY movement continues to evolve as people become more confident in tackling home improvement projects. With advancements in instructional content available online, such as videos, tutorials, and step-by-step guides, homeowners are well-equipped to undertake projects that require both plumbing and carpentry skills. This trend not only reduces reliance on professional services but enhances resourcefulness among individuals.

DIY Plumbing Projects for the Homeowner

The allure of DIY projects in plumbing extends beyond watering taps. Individuals can explore other essential plumbing repairs around their homes, from repairing leaky faucets to replacing showerheads and even installing rainwater collection systems. Understanding how to work with plastic pipes will empower homeowners to take on these challenges effectively.

Conclusion and Implications for Homeowners

The clever trick demonstrated in the video not only highlights an immediate solution for connecting watering taps but also serves as a reminder of the broader implications for DIY home improvement. As we embrace technologies and techniques that simplify tasks, we empower ourselves to take control of our living environments. Engaging with plumbing repairs, combined with carpentry skills, positions homeowners to enhance their properties creatively and efficiently.

To fully embrace the DIY spirit of home improvement, consider expanding your knowledge base—delve into both plumbing and carpentry. This combination not only enriches your skill set but also enhances your home’s overall functionality and aesthetic appeal.

Home Improvement Tips

0 Views

0 Comments

Write A Comment

*
*
Related Posts All Posts
08.05.2025

Avoid Ripping Masking Tape: Essential Tips for Home Remodelers

Update Understanding the Frustrations of Masking Tape Anyone who has taken on a DIY project is likely familiar with the common frustrations of using masking tape. Though designed to provide clean lines and easy removal, it can sometimes behave unpredictably, ripping unexpectedly and ruining the precision of your work. So, why does masking tape rip? It could be due to a variety of reasons, including poor application techniques, incorrect type of tape for the job, or environmental factors like humidity and temperature.In 'How to Fix Masking Tape That Keeps Ripping,' the discussion highlights key frustrations and solutions surrounding this common DIY issue, and we’re expanding on its insights. Practical Tips for Choosing the Right Masking Tape The first step to avoid ripping isselecting the right kind of masking tape. Not all masking tapes are created equal, and different applications require different types. For example, painter’s tape is typically designed for use on walls and ceilings, while a stronger tape may be necessary for rough surfaces like wood or stucco. Consider using longer-lasting products for longer projects, as some tapes might start to lose their adhesion over time. Application Techniques to Ensure Success Proper application is key to making the most out of your masking tape. Begin by cleaning the surface where you'll apply the tape. Dust, dirt, or grease can prevent adhesion and lead to tearing. Always apply the tape straight, without twisting it, to avoid uneven pressure that causes it to rip. Don't pull it tight, either; leave enough slack in the tape to reduce the chances of tearing when you remove it. Environmental Factors: The Hidden Culprit Environmental conditions can also affect the performance of masking tape. High humidity can cause the adhesive to become less effective, while cold air can make the tape less pliable, leading to rips and tears as you pull it off. Ideally, you should aim to work in a controlled environment, avoiding extremes in temperature or humidity whenever possible. Customer Experiences: Lessons Learned Your fellow DIYers may have valuable insights into what works best. Many echo the benefits of using a tape with a lower tack for delicate projects, which is specifically designed for easy removal but still holds firmly during application. Customer reviews often highlight which products have stood the test of time, especially for home remodeling projects ranging from kitchen and bathroom renovations to more extensive work like window replacements and roofing. Future Innovations in Masking Tape As with many home improvement products, innovations are on the horizon. Look out for tapes that are designed to deliver not just a better seal and easier removal, but also one that can adapt to various surfaces and conditions. The right advancements could mean fewer frustrations and more successful DIY projects—paving the way for smoother renovations. Conclusion: Simplifying Your Home Improvement Projects In summary, choosing the right masking tape, applying it correctly, and being aware of environmental factors can significantly reduce rips and tears, simplifying your home improvement projects. To enhance the success of renovations, consider the importance of quality materials and goods specific to your project's needs. If you're eager to dive into your next home improvement project without the hassles of ripping masking tape, take some time to research the best options available. Shopping from trusted sources can save you time and frustration—ensuring that your kitchen or bathroom remodel goes as smoothly as possible.

08.05.2025

What to Expect When Quitting Your Job for Freelancing

Update The Shift from Traditional Employment to Freelance Work In the current economic climate, more individuals are leaving the confines of traditional employment for the freedom of freelance work. Many might assume that quitting a job automatically translates to a decreased workload. However, the opposite is often true. Those who embark on freelance careers frequently find themselves working more hours, managing a multitude of tasks, and navigating complex challenges unique to self-employment.In '🚨 Quitting your job doesn’t mean you’ll work less', the discussion dives into the realities of transitioning to freelancing, prompting further analysis of this timely subject. Understanding the Reality of Freelance Work Quitting your job, while enticing, often leads to an unexpected increase in workload. As freelancers, individuals must not only perform their designated tasks but also handle their own marketing, client relations, invoicing, and more—essentially become a “one-person business.” Studies indicate that freelancers often work harder than their traditionally employed counterparts, typically logging more hours to secure clients and maintain financial stability. The Financial Implications One of the most pressing realities is the variance in financial security. Freelancers can face periods of feast or famine; income is inconsistent and heavily dependent on client acquisition. The pressure to secure projects can push individuals to work outside typical hours and include various tasks often outside their defined job roles. Managing finances becomes crucial, as unexpected expenses, such as healthcare or retirement savings, must be handled independently Impacts on Work-Life Balance A common misconception is that self-employment yields more time for personal pursuits. While the flexibility of freelancing allows some to design their schedules, it often blurs the lines between work and personal life. Without set office hours, freelancers may find themselves working at odd hours or on weekends, making it difficult to detach and maintain a work-life balance. Actionable Insights for Future Freelancers For those contemplating a switch to freelance work, it is essential to conduct thorough research and create a well-structured plan. Here are some actionable insights: Identify Your Niche: Just as roofing professionals must understand their craft, freelancers should pinpoint their skills and market demand. Build a Financial Safety Net: Aim to save a buffer equivalent to three to six months of living expenses before transitioning to freelance. Time Management Tools: Utilize tools designed to keep track of tasks, billing, and scheduling. Preparing for the Challenges Ahead Lastly, embracing the challenges of freelancing is vital for long-term success. Acknowledging that the road may be arduous and less predictable prepares one mentally for the demands ahead. This understanding allows aspiring freelancers to cultivate resilience, adaptability, and a proactive mindset essential for navigating unpredictability. Conclusion: Embrace the Reality of Freelancing In summary, while quitting your job may seem like a ticket to a more relaxed lifestyle, it can instead lead to a rigorous work schedule and uncertain financial conditions. Those who are informed and prepared can still enjoy the freedoms freelancing offers while effectively managing their workload. If you’re considering making the leap, adopt these strategies to ensure a smoother transition.

08.04.2025

Transform Your Home with Effective Soundproofing Techniques

Update Soundproofing: The Quiet Revolution in Home Improvement Homeowners often overlook soundproofing when planning renovations or remodels, but it can substantially improve a living environment. Many individuals do not realize that sound transmission can transform the quality of living spaces, affecting comfort and peace. The key takeaway from the video "How to Soundproof Your Ceiling (20dB Difference)" is the significant impact soundproofing can have in a home. By addressing common issues with ceiling noise, you can alter the ambiance of your living space dramatically.In "How to Soundproof Your Ceiling (20dB Difference)," the discussion dives into the importance of soundproofing, exploring key insights that sparked deeper analysis on our end. Understanding Soundproofing Basics Before diving into specific techniques for soundproofing your ceiling, it’s essential to understand the basics. Sound travels through air and solid surfaces; therefore, both must be addressed. This can include everything from insulation between floors to the materials used in the ceiling itself. With a potential 20dB difference as noted in the video, you can create a noticeably quieter environment. This solution is especially beneficial for multi-story homes, where noise can become a significant issue. Popular Soundproofing Techniques Effective soundproofing techniques include adding insulation, decoupling structures, and using sound-damping materials. Here are several popular approaches: Acoustic Panels: These are specifically designed to absorb sound and can be aesthetically pleasing when integrated into a design. Adding Resilient Channels: This involves installing metal channels on the ceiling joists before attaching drywall, providing a break that reduces sound transmission. Use of Soundproof Drywall: This specialized drywall contains sound-damping properties that can significantly reduce noise transfer. Insulation: Incorporating high-density insulation within the ceiling space can absorb sound vibrations, greatly enhancing the room's acoustics. Incorporating Soundproofing in Home Remodeling Projects Whether you're embarking on a kitchen remodel, bathroom remodel, or simply enhancing your living room, incorporating soundproofing should be a priority. For those selling their homes, sound improvements can increase property value, making a home more appealing to potential buyers by enhancing comfort and functionality. Future Implications of Soundproofing Initiatives As urban living continues to rise, soundproofing will play a crucial role in the future of home design and renovation. Homebuyers, especially those in busy areas, will likely prioritize soundproofing features. Understanding this trend can not only guide your remodeling choices but also advise homeowners looking to sell in the future. By enhancing sound control, they can create a sanctuary, adding to the overall attractiveness of the property. Realizing the Value of Quiet Spaces In our fast-paced world, creating quiet spaces in the home is increasingly valuable. Soundproofing adds comfort and privacy, allowing for restorative environments essential in our busy lives. Whether you're entertaining guests, working from home, or simply relaxing, soundproofing ensures that external disturbances remain outside. Final Thoughts With every renovation project, it's vital to consider all angles, especially the auditory experience of your home. Whether you’re remodeling a room or undertaking more extensive renovations, sound control should be a critical factor in your decision-making process. The insights from the video "How to Soundproof Your Ceiling (20dB Difference)" underscore the importance of investing in soundproofing solutions that create lasting impacts. If you’re ready to transform your living space, consider soundproofing as a vital component in your next home improvement project. Addressing these essential elements now can enhance your comfort and future property value. Explore possibilities with insulation and soundproofing materials and experience firsthand the difference they can make!

Terms of Service

Privacy Policy

Core Modal Title

Sorry, no results found

You Might Find These Articles Interesting

T
Please Check Your Email
We Will Be Following Up Shortly
*
*
*